"Where family, tradition, handmade, and history all meet." is more than just a catch phrase...it is our offer to you. With practical luxuries your skin will be enchanted by, unique handcrafted jewelry, and fun fiber for all ages!

The landing page is full of all of our giveaways and freebies. If you enjoy what you're finding be sure to also remember to support what we're doing by purchasing through one of the etsy shops or ordering a new favorite from us directly.

Even while all of our website pages are under construction, we hope you'll continue to join in the adventure with us! Keep touch here, on facebook, twitter, or in our etsy shop. We're so excited to see what surprises jump up next!

Where have you gone?

For those who are still looking for us through this web page, please know: we got to rebrand. You can still find all of your favorites as well as new treasures through the Handcrafter's Lair. Such can be found on facebookinstagramtwitter, and directly at handcrafterslair.com  As we are pulling everything together, we're excited to invite you to join our fantastical adventures into enjoying memories, folklore, and imagination by incorporating all our senses. Curious? Be sure to head over and watch as it all unfolds!

Please excuse our dust as we're working hard to get everything updated and more streamlined as well as being able to introduce our brand new product line.  Be sure to head over to the facebook page for all of the latest updates, conversations, and even some contests.  For all of our new and favorite product listings, you can also go directly to the Handmade Heritage etsy shop to find your favorite snowman hats, pigtail wigs, fuzzy caterpillars, ruffly ponies, and more.

Pony Stitch-A-Long Part 2: Making the Body, Head, Nose, Neck, and Ears...oh my!


As I said before we're going to be working through this a little at a time with a week in between to help you sort out confusion to build your perfect parts, perhaps make more than one version (for those of you thinking ahead towards gift-giving), and (as in my case) to help everyone also keep working on all of those UFOs that are patiently...or not so patiently...calling to you from your work baskets while you're making your new friends.  That is going to mean that we're going to work these up in parts (trust me, my kids think it is hilarious that I am always carrying around a basket of body parts that I sew together after they are all finished but it has proven to be the best way for me to make sure that they all work out the right way), so set aside a corner of a basket or a bag to hold your finished pieces until the next "gathering".  Week 1 (yep, this week) we'll be making the Body, Head, Nose, Neck, and Ears.  Week 2 we'll make the Forelegs and Hindlegs.  Week 3 we'll be stitching all of our parts together.  Then week 4 we'll be going over what to do with all of that ruffle yarn for the mane and tail.

On a more personal note, two things for you to know about me ahead of time.  I'm painfully far from being a YouTube specialist or camera expert so I hope you'll bear with me as I'll refer you to the best keywords I've been able to find to search videos out on YouTube on the basic "how to" for the techniques.  I recommend you watch a few as you'll find that like with many fiber-weaving techniques there are a couple variations on how to do things "properly"...go with taking the time to study them out if you aren't familiar with them and find the one that is going to yield the most smooth, secure results based on how you hold/feed your yarn and hooks but be prepared for me to change things up a little bit as there are a couple thing I've learned to do differently with these that will help keep your project be more secure/able to survive (I have 3 boys who LOVE to "product test" things for me by beating each other with them when my back is turned so I learned to make sure of this one).  Another note about me: I'm very far from being a professional photographer, and I use an old camera.  So many times, you'll be able to tell the difference between which pictures are taken/edited by me and which are by amazing photogs willing to lend their skills....please just look for the details I'm pointing you at and react with forgiveness (especially with the blurry pictures)? :)  Ok, on to the real fun!

First up (for this week): tips and pictures that may help you as you stitch up the head, body, neck, ears, and nose of your pony. 

One of the biggest issues with most people in learning to work stuffed animals (also known as amigurumi, depending on your style and end product) is to learn and perfect the Magic Ring (otherwise also known as magic circle, adjustable circle, adjustable foundation, magic foundation round, etc).  For those of you who are still learning how to start a project with the Magic Ring, you can just search out several DIY videos via YouTube with the terms mentioned before (like I said, I'm not yet a YouTube specialist so I'm going to send you to others then try to help from there) as they will give you the graphic and movement far better than I can right now.  Basically, it boils down to using your feeding line instead of your tail to begin your first stitch leaving your tail free to cinch your ring tightly closed.  In the case of any projects I'm making out of acrylic (because acrylic will slip so much rather than felting together to secure as happens with natural fibers such as wool) I'll not worry about working the 1st row over the tail and instead include a securing knot after I have worked the slip stitch into the initial chain (making sure that the tail is pulled up along the slip stitch).  That securing knot is done by working a tight granny or square knot with the tail and feeding lines, then continuing on with my project and working the stitches over the remaining tail by laying it along the top of the first row's stitches.
So you'll know what I mean between tail and feed lines.
Pulling the tail up BEFORE working the sl st to prep for knotting.

After you work the sl st, tightly use the feed line and tail to tie a knot to secure the cinch on your magic ring.


Another thing that might help some is an explanation of what it means in the pattern to "work a final stitch into the joining stitch".  As an example, you'll be working a final double crochet into the joining stitch on row 3 of the head (the first time you'll find this).  This isn't a typical approach (at least not with the patterns I've worked with in the past), but it works to maintain pattern repetitions.
Sorry for the blurry, but as stated normally you would just sl st to end the row but in this part of the pattern you're told to work into the joining stitch...and now you know where that is.

Remember as you are working these body parts to check ahead so you know which rows to begin stuffing your pony (otherwise you'll find yourself frogging your way backwards and redoing hefty chunks of given parts).  With the head, it will look something like....
Before tying off.
After tying off.


With the ears, you'll find instructions about doing a half double crochet 2 together.  Honestly, I'll tell you to just head back over to YouTube and watch a couple of videos over there to learn the stitch.  The end look of your ear should look like....

Just a pict to try and show you the differences between the stitches, this helps to create the 'fold' of the inner ear.


Remember with the neck and nose parts that you won't actually be stuffing these until we go through and sew all of our parts together.  (Yeah, my kids all call it "Mom's Frankenstein complex, lol.)

Ok....now that we've gotten through the fun of figuring out how to make these pieces...anyone willing to show off what they've done so far?  Be sure to share your pictures with us on our facebook wall at www.facebook.com/TheHandmadeHeritage so we can brag about how awesome you all are!

Pony Stitch-A-Long: Part 1 (the pattern itself)

How many of you are ready for some pony fun?  I know I am!!!

For those of you who are prepping for our stitch-a-long, we're almost there!  In getting ready, it might be helpful to read through the pattern itself ahead of time so we're posting this now.  We'll be taking this in steps to help everyone as we work together in stitching up your new little friend and hopefully we'll be able to answer any questions you have that way so be sure to check those posts....you'll also find pictures there to help you understand things like how I refer to my own adopted techniques (for securing a magic ring, for instance or working into a joining stitch) for anyone who doesn't already know.  If those don't help fill in the gaps, leave a comment here or email me directly and I'll try and figure out the best way to help.  Can't wait to see what you are able to make of your new friend, happy stitching all!!!  (Don't forget: this pattern is based on an original designed by Megan Daly.  You can find her single-strand original as well as links to be able to donate to her at http://hooked-on-anime.dreamwidth.org/6139.html which we'd strongly encourage as a thank you to her for her generosity!)

Please note: While the way I'm writing my pattern is made as simply as I can make it, this is not a beginning crochet lesson.  You'll need to know how to make the stitches as described in the abbreviations list.  There is a plethora of YouTube videos on how to do this....I'll see if I can find some of my favorites to share with each of the posts that come if I'm able but you'll want to make sure you understand them yourself before jumping into this project.

Double-Stranded Pony Pattern


Materials
Worsted Weight Yarn (4 skeins Encore, or 2 skeins I Love This Yarn),
** plan on a little of extra yarn for the eyes of a different color from a stash (brown, black)**
Ruffle Yarn (1 ball complimentary colors to body)
Hook size J/10-6.00mm
Hook size F/5-3.75mm
Tapestry Needle

Tips
*Please read the whole pattern beginning to end first before you start stitching your parts.
*Every yarn part is stitched with double strands simultaneously unless otherwise indicated.
*For final count of stitches, the initial chain series will count as a full stitch unless otherwise indicated in the pattern.
*To put all of the various animal parts together, read the instructions at the end of the pattern/stitch-a-long.
*When stuffing your parts, follow the instructions with each piece....typically found at the end of that particular part in the pattern (hence part of the suggestion to read the entire pattern through before beginning).
*There will be specific pictures with each of the stitch-a-long blog posts that are intended to help people see what I might be referring to if you have any questions.  Please be sure to check those out since they are actually separate from the pattern posting itself.  I'll add links to them after we finish the actual stitch-a-long for those of you joining us later.

Abbreviations
Ch- chain
Dc- double crochet
Sl st- slip stitch
Dc2tg- double crochet 2 together
Bpsc- back post single crochet
Fpdc- front post double crochet
Fpdc2tg- front post double crochet 2 together
Hdc- half double crochet
Hdc2tg- half double crochet 2 together


Stitching Instructions
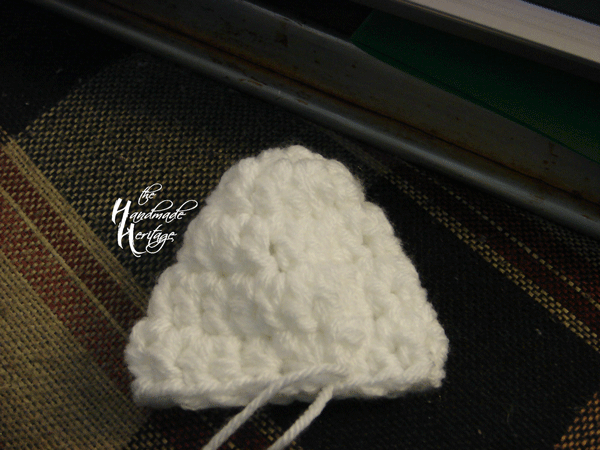
Head
Foundation: Magic Ring

Row 1: Ch 3, then work 11 dc into the magic ring.  Cinch the magic ring as tightly as possible, then sl st into the 3rd ch and secure. (12 stitches)

Row 2: Ch 3, then *work 2dc into the first stitch then 1 dc into the next stitch*.  Repeat *to* all the way around then sl st into the 3rd ch. (18 stitches)

Row 3: Ch 3 then *work 1 dc into each of the next two stitches, then work 2 dc into the next stitch*.  Repeat *to* all the way around finishing by working a final dc into the joining stitch then sl st into the 3rd ch. (24 stitches)

Row 4: Ch 3, then work 1 dc into the first stitch.  Next *work 2 dc into the next stitch followed by 1 dc into each of the next three stitches*.  Repeat all the way around finishing with a dc into the last stitch then sl st into the 3rd ch. (30 stitches)

Row 5: Ch 3, then *work 1 dc into each of the next four stitches followed by 2 dc into the fifth stitch*.  Repeat *to* until the end of the row where you'll finish by working a final dc into the joining stitch then sl st into the 3rd ch. (36 stitches)

Row 6: Ch 3, then work 1 dc into each of the stitches all the way around. (36 stitches)

Row 7-8: Repeat row 6.

Row 9: Ch 3, then *work 1 dc into each of the next four stitches followed by 1 dc2tg*.  Repeat *to* until the end, finishing with the last dc2tg directly into the 3rd ch. (30 stitches)

Row 10: Ch 3, then work 1 dc into the first stitch.  Then *work 1 dc2tg followed by 1 dc in each of the next three stitches*.  Repeat *to* all the way around, finishing with a sl st into the 3rd ch. (24 stitches)

Row 11: Ch 3, then *work 1 dc into each of the next two stitches followed by 1 dc2tg*.  Repeat *to* all the way around, finishing by working the final dc2tg into the 3rd ch.  (18 stitches)

Row 12: Ch 3, then *work 1 dc2tg followed by 1 dc into the next stitch*.  Repeat *to* all the way around, finishing by working the final dc2tg and then sl st into the 3rd ch. (12 stitches)

Row 13: Ch 3 then work a dc2tg, repeat all the way around.  Finish with the final dc2tg being worked into the 3rd ch directly. (6 stitches)

Break off, leaving a tail only long enough to weave into the strands.  Be sure to secure the closure by tying securely closed (I'll usually secure that knot tightly into the stitch directly opposite the sl st closure).

*To stuff, what I do is when you get to row 11 get your nylon stocking out, stretched width-wise for a bit, then put it inside the cavity.  Stuff this as full as you can to the top of the cavity so it feels firmly stuffed.  Twist the nylon tight and tie a knot firmly in the end, then cut the nylon end off and save it for using to stuff the other pieces (be sure to tie a tight knot at the open end to prep for stuffing the next piece).  Finish the head part by working through row 13 and be sure to keep the nylon tail inside before you break off and tie to secure the closing.

Body
Foundation: Magic Ring

Row 1: Ch 3, then work 11 dc into the magic ring.  Cinch the magic ring as tightly as possible, then sl st into the 3rd ch and secure the ring tail. (12 stitches)

Row 2: Ch 3, then *work 2 dc into the first stitch followed by 1 dc into the next stitch*.  Repeat *to* all the way around, finishing with a sl st into the 3rd ch. (18 stitches)

Row 3: Ch 3, then *work 1 dc into each of the next two stitches followed with 2 dc into the third stitch*.  Repeat *to* all the way around, finishing with a final dc into the joining stitch and then a sl st into the 3rd ch. (24 stitches)

Row 4: Ch 3, then work 1 dc into the first stitch.  After that *work 2 dc into the next stitch followed by 1 dc into each of the next three stitches*.  Repeat *to* all the way around, finishing with a dc into the last stitch then a sl st into the 3rd ch. (30 stitches)

Row 5: Ch 3, then *work 1 dc into each of the next four stitches followed by 2 dc into the fifth stitch*.  Repeat *to* until the end of the row where you'll finish by working a final dc into the joining stitch then sl st into the 3rd ch. (36 stitches)

Row 6: Ch 3, then work 1 dc into each of the stitches all the way around. (36 stitches)

Row 7-14: Repeat row 6.

Row 15: Ch 3, then *work 1 dc into each of the next four stitches followed by 1 dc2tg*.  Repeat *to* until the end, finishing with the last dc2tg directly into the 3rd ch. (30 stitches)

Row 16: Ch 3, then work 1 dc into the first stitch.  Then *work 1 dc2tg followed by 1 dc in each of the next three stitches*.  Repeat *to* all the way around, finishing with a sl st into the 3rd ch. (24 stitches)

Row 17: Ch 3, then *work 1 dc into each of the next two stitches followed by 1 dc2tg*.  Repeat *to* all the way around, finishing by working the final dc2tg into the 3rd ch.  (18 stitches)

Row 18: Ch 3, then *work 1 dc2tg followed by 1 dc into the next stitch*.  Repeat *to* all the way around, finishing by working the final dc2tg and then sl st into the 3rd ch. (12 stitches)

Row 19: Ch 3 then work a dc2tg, repeat all the way around.  Finish with the final dc2tg being worked into the 3rd ch directly. (6 stitches)

Break off and weave in the ends.

To stuff, work a new nylon the same as with the head.  I will usually begin to stuff when I reach row 16, then just twist off the nylon until you finish row 18 when you make sure that the entire cavity is filled firmly before tying off as before and continuing with the entire piece.


Forelegs (make two)
Foundation: Magic Ring

Row 1: Ch 3, then work 11 dc into the magic ring.  Cinch the ring as tightly as possible, then sl st into the 3rd ch.  Use the sl st to help secure the ring, then secure with a double knot into the feeding line.  (12 stitches)

Row 2: Ch 3, then work 2 dc into each stitch all the way around.  Finish the row with a final dc into the joining stitch and then sl st into the third ch. (24 stitches)

Row 3: Sl st into the back post, then ch 2 followed by 1 scbp into each stitch all the way around.  Sl st into the second ch. (24 stitches)

Row 4: Ch 3, then work 1 dc into each stitch all the way around.  Finish with a sl st into the third ch. (24 stitches)

Row 5: Ch 3, then work 1 dc2tg, followed by 1 dc into each stitch all the way around. Finish with a sl st into the third ch. (23 stitches)

Row 6: Ch 3, then work 1 dc2tg, followed by 1 dc into each stitch all the way around.  Finish with a sl st into the third ch. (22 stitches)

Row 7: Ch 3, then work 1 dc2tg, followed by 1 dc into each stitch all the way around.  Finish with a sl st into the third ch. (21 stitches)

Row 8: Ch 3, then work 1 dc2tg, followed by 1 dc into each stitch all the way around.  Finish with a sl st into the third ch. (20 stitches)

Row 9: Ch 3, then work 1 dc2tg, followed by 1 dc into each stitch all the way around.  Finish with a sl st into the third ch. (19 stitches)

Row 10: Ch 3, then work 1 dc2tg, followed by 1 dc into each stitch all the way around.  Finish with a sl st into the third ch. (18 stitches)

Row 11: Ch 3, then work 1 dc into each stitch all the way around.  Sl st into the third ch to close. (18 stitches)

Row 12-15: Repeat row 11.
Break off, leaving a tail long enough to use to stitch securely to the animal. 

To stuff, start when you finish row 10 and twist the top of the nylon closed.  Then finish stitching through row 14 and finish the piece.  Finish stuffing the leg securely and twist/tie the top...be sure to stuff it as fully as possible without warping the shape of the leg.


Hindleg (make 2)
Foundation: Magic Ring

Row 1: Ch 3, then work 11 dc into the magic ring.  Cinch the ring as tightly as possible, then sl st into the 3rd ch.  Use the sl st to help secure the ring, then secure with a knot into the feeding line.  (12 stitches)

Row 2: Ch 3, then work 2 dc into each stitch all the way around.  Finish the row with a final dc into the joining stitch and then sl st into the third ch. (24 stitches)

Row 3: Sl st into the back post, then ch 2 followed by 1 scbp into each stitch all the way around.  Sl st into the second ch. (24 stitches)

Row 4: Ch 3, then work 1 dc into each stitch all the way around.  Finish with a sl st into the third ch. (24 stitches)

Row 5-6: Repeat row 4.

Row 7: Ch 3, then work 1 dc2tg, then work 1 dc into each remaining stitch. Sl st into the third ch to close. (23 stitches)

Row 8: Ch 3, then work 1 dc2tg, then work 1 dc into each remaining stitch.  Sl st into the third ch to close. (22 stitches)

Row 9: Ch 3, then work 1 dc2tg.  Then work 1 dc into each remaining stitch.  Sl st into the third ch to close (21 stitches)

Row 10: Ch 3, then work 1 dc2tg.  Then work 1 dc into each remaining stitch.  Sl st into the third ch to close. (20 stitches)

Row 11: Ch 3, then work 1 dc2tg.  Then work 1 dc into each remaining stitch.  Sl st into the third ch to close. (19 stitches)

Row 12: Ch 3, then work 1 dc2tg.  Then work 1 dc into the next 5 stitches.  After that, work 3 fpdc2tg followed by 1dc into each of the remaining six stitches.  Sl st into the third ch to close. (16 stitches)

Row 13: Ch 3, then work 1 dc into each of the next six stitches.  Then work 2 fpdc into each of the next three stitches followed by 1 dc into each of the next six stitches.  Sl st into the third ch to close. (19 stitches)

Row 14: Ch 3, then *2 dc followed by 1 dc into each of the next five stitches*.  Repeat *to* all the way around, then sl st into the third ch to close. (22 stitches)

Row 15: Ch 3, then work 1 dc into each of the next three stitches followed by 2 dc into the next stitch.  Then *work 1 dc into each of the next six stitches followed by 2 dc into the next (7th) stitch*.  Repeat *to* once, then finish the row by working 1 dc into the remaining three stitches.  Sl st into the third ch to close the row. (25 stitches)

Row 16: Ch 3, then work 1 dc into each stitch all the way around.  Sl st into the third ch to close the row. (25 stitches)

Break off, leaving a tail long enough to stitch the hindleg securely to the body.

To stuff this leg, you'll start stuffing it when you reach the end of row 11 (or before you close row 12).  Twist your nylon to temporarily close while you finish stitching the leg.  After you break off, untwist the nylon and finish stuffing the leg but with the hind leg you'll want to be sure you only fill it to about the 15th row (to leave room to sculpt the leg up the side and back of the body) then tie it off securely and snip the extra.

Neck
(With this, the initial chain series for each row does not count in the final stitch numbers)
Foundation: Ch 23, then sl st into the first ch (forming a ring).

Row 1: Ch 1, then work 1 sc into each of the stitches all the way around. (22 stitches)

Row 2: Ch 1, then work 1 sc in each of the next six stitches.  Then work 1 hdc into each of the next eleven stitches, then work 1 sc into each of the next five stitches.  Sl st into the first ch of the row to close. (22 stitches)

Row 3-7: Repeat row 2. (22 stitches)
Break off, leaving both tails long enough to stitch the neck securely to both the body and the head.  When you stitch this in place, you'll start by weaving one tail up the length of the short part of the neck to stitch to the head and then stitch the neck directly to the body (please see the notes at the end to help you understand my own method for connecting the various body parts especially with the neck).

For stuffing this, wait until you have the neck stitched firmly to the body and then stuff very firmly before stitching the head to the neck.


Nose
Foundation: Magic Ring

Row 1: Ch 2, then work 6 sc into the magic ring.  Sl st into the second chain to close the row then cinch the magic ring as tightly as possible then secure with a tight knot with the feeding line. (6 stitches total....does not include the initial chain series)

Row 2: Ch 3, then work 2 dc into each of the stitches all the way around.  Finish by working a final dc into the joining stitch, then sl st into the third chain. (14 stitches total)

Row 3: Ch 3, then work *2 dc in the first stitch followed by 1 dc into the next stitch*.  Repeat *to* all the way around, finishing with a sl st into the third ch. (21 stitches)

Row 4: Ch 3, then work 1 dc into each stitch all the way around.  Sl st into the third chain to finish the row. (21 stitches)
Break off, leaving a tail long enough to stitch firmly to the head. 

For stuffing, stitch the nose 1/2-3/4 of the way to the head.  Then begin by working in a small amount at a time, enough to firmly shape the nose but without stretching it out.  Tie off your nylon, then finish stitching the nose onto the head securely.


Ears (make 2)
Foundation: Magic Ring

Row 1: Ch 2, then work 6 sc into the ring.  Sl st into the second chain, then cinch the ring as tightly as possible before securing with a secure knot with the feed line.  (6 stitches total, not including the chain series used to start the row.)

Row 2: Ch 3, then work 2 dc into the first stitch followed by *1 dc into the next stitch.  Work 2 dc into the next stitch*, then repeat *to* all the way around.  Finish with a sl st into the third ch. (12 stitches total)

Row 3: Ch 3, then *work 1 dc into each of the next two stitches followed by 2 dc into the third stitch*.  Repeat *to* all the way around, finishing the pattern repeat with a final dc into the joining stitch.  Sl st into the third ch to close the row. (16 stitches)

Row 4: Ch 3, then work 1 dc into the next stitch.  Then *work 2 dc into the next stitch followed by 1 dc into each of the next three stitches*.  Repeat *to*twice then finish the row by working 2 dc into the next stitch followed by 1 dc into the next stitch.  Sl st into the third ch to close. (20 stitches)

Row 5: Ch 3, then *work 1 dc into each of the following four stitches followed by 2 dc into the next stitch*.  Repeat *to* twice, then finish the row by working 2 hdc2tg.  Sl st into the third chain. (21 stitches)
Break off, leaving a tail long enough to stitch securely to the head.

No stuffing needed for these.


Eyes (make 2 of these using only a single strand of yarn. Use the H hook and the darker color (brown, black, etc) vs the body)
Foundation: Magic Ring

Row 1: Ch 3, then work 13 dc into the magic ring.  Sl st into the third ch and cinch the magic ring as tightly as possible.  (Measure off the extra long tail before securing the magic ring and break off.)  Secure the magic ring.


Ok, have you all your materials, hooks, needles, and excitement?  Get them ready, we'll be meeting at Knit Unique on Main Street in Logan tomorrow (Tuesday) at 6pm and I'll be posting here online the following day....see you then!! :D

A Pony Stitch-A-Long!

Yep, you read right: we're going to be hosting a stitch-a-long for everyone!  And it isn't just any ol' design either...this is the incredibly popular Pony pattern!

We're going to be doing this two different ways:

1- In person at Knit Unique on Main St. in Logan, Utah where we'll get to play with our fiber and hooks as we work each of these parts up together, helping to answer any questions to come up.  We'll be doing this each Tuesday night at 6pm starting on July 29th and running until August 19th.  Not available those nights or not local?  No fear!

2- We're also hosting our stitch-a-long here online as well!  Each week on Wednesday, we'll be updating the blog with specific directions regarding the parts we're learning directly as well as pictures to help fill in a few of those blanks that aren't as easily explained (at least for this lady who happens to be a bit more verbally challenged).  I'm also hoping that you'll join with showing off your progress on the facebook page as we go.  You can ask questions either in the comments to each blog post or there on the facebook page or even via email.

I know, I know...you already have questions. How about we try and answer just a few to help everyone get ready?

First of all, for this particular stitch-a-long, there is no cost involved save for the cost of your materials (the list will be posted shortly so keep reading, but if you purchase your supplies at Knit Unique I believe they usually have a discount offered for any of the classes) and a suggested donation to go to the one who our pattern design is based on. This pattern I'm about to share with y'all is based on a genius design created by Megan Daly over at Hooked on Anime.  She is sharing this free of charge at http://hooked-on-anime.dreamwidth.org/6139.html, though there is a suggested donation of $6 to help her be able to continue sharing her patterns.  You can find her story there....my story follows which will explain a bit about the differences.

Basically, last Summer I had a special commission request come in via a friend and colleague at the local Gardeners' Market.  She was looking to be able to get a giant crochet pony for her daughter's upcoming birthday and she wanted it to be styled similarly to the My Little Pony character Rarity.  I agreed to help her, with the warning that it would take a great deal of time....especially as this was going to be a totally new take on things for me.  So I started doing my research.  After a few brain-racking months (and some crazy fun watching some of the new cartoons with my kids who are now TOTALLY addicted), I finally figured I would learn from a making a smaller version and began searching...and stumbled across Megan's generous and genius design.  After making it, I started tweaking with the pattern (finally figuring out I'd more or less have to start from scratch) and thus was born the GIANT pony.  For the sake of my own sanity, as well as in an effort to find ways to make other animals for myself/all of you of various sizes, I later went back and added my own twist to the pony pattern so that it works for using double stranded yarn (which changes the finished size and weight thus requiring a tiny bit of tweaking) plus added some ruffle yarn to use for the mane and tail.  As this isn't my own creation but instead is based on Megan's genius, I'm hoping that the double stranded translation will be a fun twist for those of you who are already used to her fun pattern but we want to keep credit where credit is due so be sure to let her know how much we all appreciate her!

Ok, enough boring history.  On with the fun preparations!

Just an example of what a pony looks like made from these brands.
To join us for our fun project, you'll need the following:
*1 full skein (maybe more if you prefer a REALLY full ruffle) of ruffle scarf yarn, Choose This First!
*2-4 or more skeins of worsted weight yarn.  The kind of yarn is based on your own preference, but it also tends to dictate how many skeins you'll need.  For example, when I use the I Love This Yarn acrylic brand (the Hobby Lobby stuff) I'll go through 2 skeins.  When I use the Encore brand (the acrylic I found at Knit Unique) I used 4 skeins.  Each of the yarns are going to have a different kind of elasticity so be sure that you have plenty.  One very important note: Be sure that you find your ruffle yarn first and then keep it with you to help you choose the exact color and shade of yarn you are going to use for your pony's body Trust me, trying to go the other way around is really a frustrating stinker.
*Your favorite crochet hook...size J/10-6.00mm is my preference though if you prefer a tighter stitch size down to and I (I wouldn't go lower than that, you'll start slipping the threads)
*A good tapestry needle...I prefer the Chibi brand (the larger ones with the bend needle end as the bend helps work through the threads and the larger size allows for the multiple strands faster/easier)
*4-5 pairs nylon knee-highs (I get mine from Walmart in their little bobbles that are usually 3/$1) that are approximately the same color as your body yarn
*At least one full 12 oz package of stiff polyfil stuffing...not the quilt batting (unless you're ready to really tear it up and fluff it or you'll have battering rams...my boys proved that one!), but the already fluffed stuff.  I will usually use Morning Glory brand, but go with what you think will give you the best fill without being too fluffy or you'll never be able to get your pony to stand on its own two feet much less to hold it's head high. :)

And that is pretty much it for now.  Feel free to leave those questions in the comments so we can help everyone find their answers hopefully as easily as possible and mark the date....we don't want to miss a single one of you with our fun introductory project!!!

The Month for Giving Thanks!

We Have a Winner!!!  Thanks to everyone who participated, we had a great time getting to see you all brag about your amazing littles!  Winning announcement is found at the bottom of this blog post, including a special something extra for everyone who participated.  Happy Thanksgiving everyone!!!

We have sooo many wonderful fans, friends, and customers that we thought we'd give an offer for all of you as a way for us to say "Thank You!" for all of your support and the fun we've been able to have with all of you.....by opening things up for some more fun while helping all of you prep for the coming winter and gift-giving season!

So this is what we are proposing.  For the next few weeks, we're going to open things up a bit here online to give everyone a chance to brag about their favorite and adorable....with the added bonus of possibly being the winner to get even more.

The idea is to send us your pictures where a product you've purchased from us is included (and visible), then have all your friends and family who also like your pictures come and leave a comment. The picture that has the most comments will win the grand prize: a full $50 to choose from among all of our products.

So how can we see people leave the most comments?  Well, what you'll need to do is email us your picture to handmadeheritage@gmail.com with "Thanksgiving Giveaway submission" in the subject line and the first name and initial of the last name (for example: Thanksgiving Giveaway submission Rachel M.).  Then we'll get that up online and post the links to find it on the facebook page album, in the google+ albums, and on a specially set up pinterest board to really help you make it available to as many of your friends and family as possible (with the understanding that these will be shared publicly).  The links will be posted here (we'll amend this blog post with each person's name followed by the links placed in order of entry submission and with a number attached).  Then you just share the information with everyone you know as often as you like via your favorite means so that they can come and leave those comments.

These can be pictures of any product you've ordered from us over the past, and can also be anything that you receive from us before the contest ends.  The contest submissions must be in by Friday November 22nd 2013 and the comments counted on all fronts and the winner announced Wednesday November 27th (yep, the day before Thanksgiving).    Then....be sure to stay tuned, we're working some fun things just for the weekend after Thanksgiving (including Cyber-Monday).  Ok, ready?  Set?  Go!!!

Links:
Facebook Album: www.facebook.com/thehandmadeheritage
Pinterest Board: www.pinterest.com/thehandmadeheritag
4- Sent in by Genessa Oak, this little darling dressed to match is just a doll!!!
5- Submitted by Deb Johnson, this girl is seriously having fun with one of our Granny Fan Beret's...and who can blame her with that smile?

6- Sent in by JS Camarda, doesn't this adorable little guy make you want to just grant any wish he should come up with? 
2- Submitted by Kelli Harris, this handsome guy finished off his costume with our Scarecrow Hat and clearly charmed those crows right out of the sky!
3-Submitted by Brittany Willis, this warm baby grin with a custom ordered cap is so soft and warm..and so incredibly contagious!
1- From Crystal Hoeg, are you ready for a picture that is likely to make you giggle along with?
And the winner is.......Crystal Hoeg!  Congratulations and great job guys, that was an incredibly close race!  Plus as a special thanks, how about an awesome discount just to say "Thanks for playing with us and Happy Thanksgiving".  Just enter FUN25 at checkout from our etsy shop to get 25% off of your order.  Happy Thanksgiving everyone, and truly...Thank You from the bottom of our hearts, the only reason we are able to do so much with and for others is because of You!

Jingle Bells?!?!?!

This contest is closed, though stay tuned for more fun to come!  (Answer is posted at the tail of the blog post.)  Thanks to everyone who came and played with us!

The sun is sending heat down in waves, cool lake and ocean waters are beckoning, toes everywhere are crying out to be buried in lake mud or sandy beaches, and (that's right, hard to believe though it may be) the craft stores are pulling out all their Christmas wreaths.  All classic symptoms of pre-Christmas fever....and a way of introducing this week's game!

I can hear the "WHAT?!?!?!" coming from a lot of you right about now, hahaha, but for those of us who are designing their own products/patterns and who sell at all those fun Christmas gift boutiques and fairs it really is about that time. Didn't you ever wonder why so many of the small-time designers push "Christmas in July" sales before?  Well, now you know (or at least, now you know one of the reasons).

Having confessed all that, I'll state bluntly that it is the way things are around here.  Yep, Christmas fever has begun!  So for this week's game, this one is going to be a guessing game and the prize is a Flip-Strip Earflap Hat w/Tassels.  Ready?

Basically, I'm asking you all: What do you think my favorite upcoming holiday design is going to be?  To enter into the contest, just a: leave a comment here or on the facebook page with your guess and b: share this contest with everyone via your favorite social media (google+, pinterest, twitter, facebook, etc.) and leave an additional comment that you shared the fun.  The winner will be chosen and announced Friday this week, but remember: you can enter one additional time for every time you share this contest via social media (one additional entry per social media site per day) and let us know about it so the more you join in and leave guesses the more chances you have to win!

How's that for a way to kick start your week? :)

  And the answer is.....The Snowman hat! (I can't resist those fun snowy looks that develop as I stitch, hahaha!)

So, are you all ready for the winner (at long last)?  Drumroll please.........Congratulations, Stephanie Nelson!  Plus as a special thanks to everyone for participating, each of you are welcome to take advantage of a 25% discount from anything in the etsy shop or the facebook page by using the code FUN25 at checkout.  Plus as a special "Thank You!" for all of your patience while we've been duking it out with our tech, we're including a pair of free flower tie-ons with each order!  

Thanks again for joining with us this time, we look forward to seeing what you think of all our newest and favorite holiday designs! 

I can't resist...

And the answer is.....lol, Read it at the bottom of the post! hahaha  Congrats and Thanks to everyone who participated, I hope you enjoyed yourselves and your rewards! (Closed now, but check back for more soon!)


Ok, so I can't resist any longer.  Soo....the game this weekend is going to be fairly quick, painless, and is starting a little early!

It is pretty simple.  Each person who can accurately figure out how long it takes me to make one of these fun Triple Slipster Headbands will win one....free (plus the cost of shipping)!  Just leave a comment here or on the facebook page's post for this contest to enter.  Winners will be announced Monday.  Easy, huh?  Ok, Ready.....Go!

P.S.
Please be kind to all of your friends and share this incredible offer with them....it will likely never be repeated again!

 *And the drummer is tired of rolling so....one of these headbands takes us about 30-45 minutes to finish (without buttons).  Congrats to Chris, Danielle, and Julie (I'll be in touch directly)!  For everyone else, as a thanks for participating, how about a cool 25% discount with any order from the page?  Just enter FUN25 at checkout to use your discount on what you find waiting for you there.

What lyrics are these?

Thanks to everyone who participated!  And the winner is, guessing My Valentine.....Lynda Bear.  Congratulations, Lynda!!  For everyone else, as a thank you to each of you please take advantage of a coupon offer found in the comments.  Happy Holiday Week, everyone!!!


You know how certain days or times there is That One Song that always takes you back to that irreplaceable moment in time?  Well, after the tech hiccups that happened over the weekend which put off our usual contest, we figured we'd simply share our own celebrations for today with all of you.  Today happens to be our wedding anniversary, so we're going to give you a hint as to a particular song that brings back the feeling, memories, and moments of that day.

How do you win?  Simply share this picture or the link to this blog post via facebook, twitter, google+, pinterest, etc., and then come and let us know that you shared (where/how) here or on the facebook post and what your guess is for the song.  The names of the people playing (and sharing/commenting) will be entered into a random list to win this pair of earrings at the cost of shipping.

Ok, the lyrics that you need to find are.... "You're all I need, my love".  We'll be leaving this game going until tomorrow, so please keep sharing and playing...the more ways you share, the more times you get entered (one method per person to count).  Ready....Go!

Holiday Weekend Giveaway!

 Thank you to everyone who participated and shared this!!!  It was our biggest response yet, thanks to all of you.  Our congratulations to Cynthia Miller for winning this entire set! We'll be doing another giveaway soon, so be sure to stay tuned...and have a terrific week everyone!  Thanks again for participating!

Photo courtesy of Katrina Hansen

Who wouldn't love the amazing smells of lemon and peppermint to have around the house, not to mention those fun soap pouches and sturdy washrags and practical dish scrubbies!

I am sooo excited to introduce the beginnings of a new product series that we've been talking and hinting about for awhile now.  The smells are amazing, the colors so cheery, and even the kids have been getting in on the act in helping come up with new ideas for everything.  So to kick it all off, we're going off schedule and hosting a special holiday weekend giveaway!

To enter for these, the method is really simple.  We want you to first of all share the link with as many people as possible (one entry per share per day, even!) via twitter, google+, facebook, or even by pinning this page to your pinterest boards.  Then we need you to come and leave a comment for each time you do this, including not only the sites you shared it with...but also your favorite scent of soap (if you want to tell us why, we wouldn't object) or favorite colors for your bathrooms or kitchens.  We'll be drawing the winner on Tuesday, so you'd better hurry and get in on the action while you still can....then go out with all those amazing loved ones and make memories and celebrate them.  We'll be here to brighten your day when the regular work week resumes with a BIG prize package including: 1 yellow rose soap scrubbie, 1 blue and 1 white soap scrubbie, 1 handmade yellow washcloth, 1 dish scrubbie, 1 bar and 1 disk each of lemon&calendula and peppermint all natural soaps. :)

Ok, on your marks....get set....GO!!!!